How To Cut With Scissors: Montessori Cutting Strips
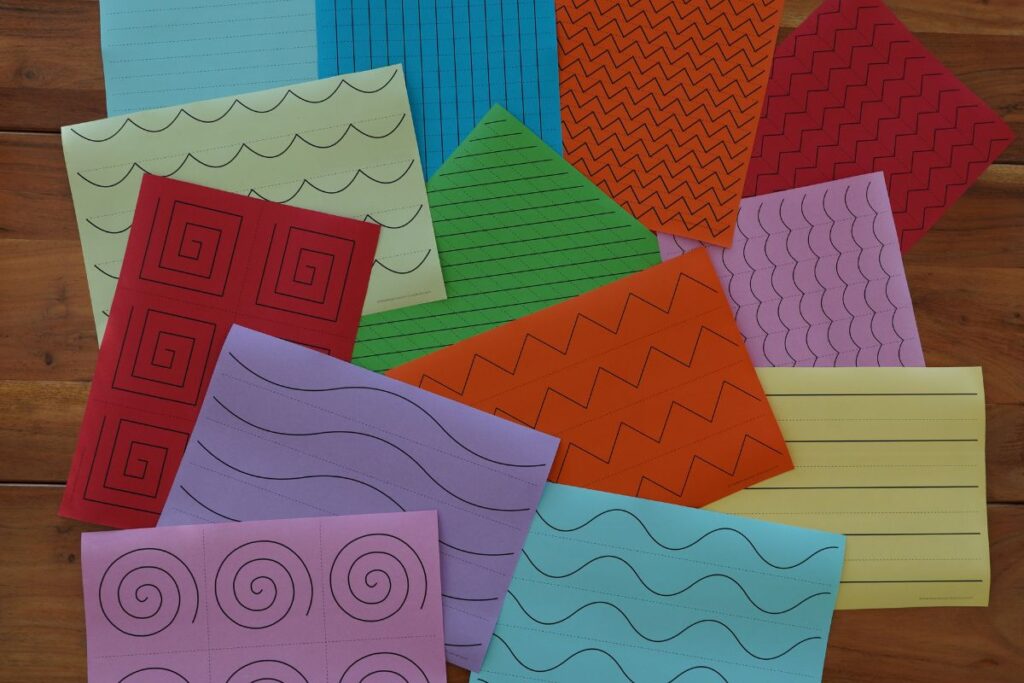
Cutting paper is a classic Montessori Practical Life activity that helps children build fine motor strength, improve hand-eye coordination, and develop concentration. Using progressive cutting strips with different line patterns, children refine their scissor skills while gaining confidence and independence. Below you’ll find a free printable PDF with 13 Montessori-inspired cutting strips designed to support your child’s development.
Target ages: 2 ½ to 4 ½ years old.
What is the Montessori Method?
The Montessori Method follows the child’s interests and needs. Maria Montessori created different areas in the classroom (Practical Life, Sensorial, Math and Language) with specific materials to teach children different skills that will help them in their everyday life.
If you think about a normal school, you would probably imagine a big chalkboard on the wall and all of the students sitting at their desk looking at the teacher. In a Montessori classroom this looks very different. The main difference between a Montessori school and a traditional one is that the teachers give one-on-one lessons, or very small group lessons, and follow the interest of each child. Individual lessons are a great way for teachers to get to know the children and their needs. We use tangible materials that are built to teach specific skills, perfect to catch the attention of the little ones since they are using their hands. Maria Montessori once said: “Movement of the hand is essential. Little children revealed that the development of the mind is stimulated by the movement of the hands. The hand is the instrument of the intelligence”.
In the Montessori classroom, children are also allowed to walk freely in their environment and choose the work they want to do that has been previously presented by the teacher. Seeing children walking around the classroom like this can look a little messy at times, but I like to call it “organized chaos”. Children have a lot of freedom but within set boundaries.
The Montessori Method has been such a big eye opener for me in the way I want to teach and educate my children. I hope it inspires you too!
The Practical Life Area in Montessori
Practical Life is an area in the Montessori curriculum where the children learn daily life skills that helps them become more independent, gain confidence and develop fine and gross motor skills.
When Maria Montessori started her educational career, she put a lot of emphasis on children’s hygiene and on different activities that encourage their independence. This is where the area of Practical Life was born. These activities are normally the first ones we introduce to children. They all have very specific goals. Maria Montessori summarized the purposes of the Practical Life activities like this:
- Independence: The goal of these activities is to help children develop the life skills necessaries to succeed in the world.
- Concentration: Children are drawn to Practical Life activities. This makes them want to repeat them over and over again. Repetition promotes concentration, which is very important for their development.
- Coordination of Movement: With these exercises the children practice fine and gross motor skills. At the same time, they gain coordination and refinement of their movements.
- Order: Every Practical Life activity follows a sequence of steps that the children need to follow. When we show these activities to our children it is very important to practice them before so that we know exactly what movements we are going to do what steps we are going to follow. This helps children with their Sensitive Period for Order that they are experiencing at this stage of their lives.
- Adaptation: Practical Life exercises are specific to each child’s culture. Some activities in Europe may look a bit different from others in Asia (for example: learning how to use cutlery). We also use real child’s size objects (like the ones they see in their house), not toys. This helps children adapt to their environment and learn how to interact with it.
- Supports development of the Will: Practical Life activities help children to develop self-discipline and self-control.
The Montessori Cutting Strips
When I was teaching in a Montessori school, we had these cutting strips on the shelf for children to practice cutting. The children loved practicing with them and it was a material that was used every day! What I most love about this activity is that it has different levels of difficulty, so if your child is younger you can start with the blank strip and just practice the movement of opening and closing the scissors in order to cut without worrying about cutting any lines. When they are a bit older and have more control over their movements, they can then do the more challenging patterns like zig-zag or curved lines.
Another thing we use to do after cutting these strips is, instead of just throwing the pieces of paper away, we will save them to later use them to make collages.
In the printable PDF you will find 13 different patterns for your child to practice cutting. Some of the patters can also be used to make crowns! My children at school, specially loved this and they often made several for all of the members of their family! I love when we can use simple activities like this one and engage our children in further work with them.
Which Scissors Should Your Child Use?
Imagine cutting vegetables or meat with a knife that doesn’t cut well, kind of dangerous, right? When children start cutting, parents tend to be a bit afraid of giving their children real scissors and they give them scissors that are made of plastic or that just don’t cut very much. These kind of scissors, at the end, are more dangerous than normal scissors. I will suggest that you give your child scissors that have a blunt tip but that are sharp enough to cut paper well. It can also be very frustrating for children to try to cut a piece of paper and not being able to because the scissors don’t work properly.
It is also good to consider if your child is right or left handed. Nowadays there are also scissors for both right and left handed children that we normally have in the classroom so that all children are able to use them.
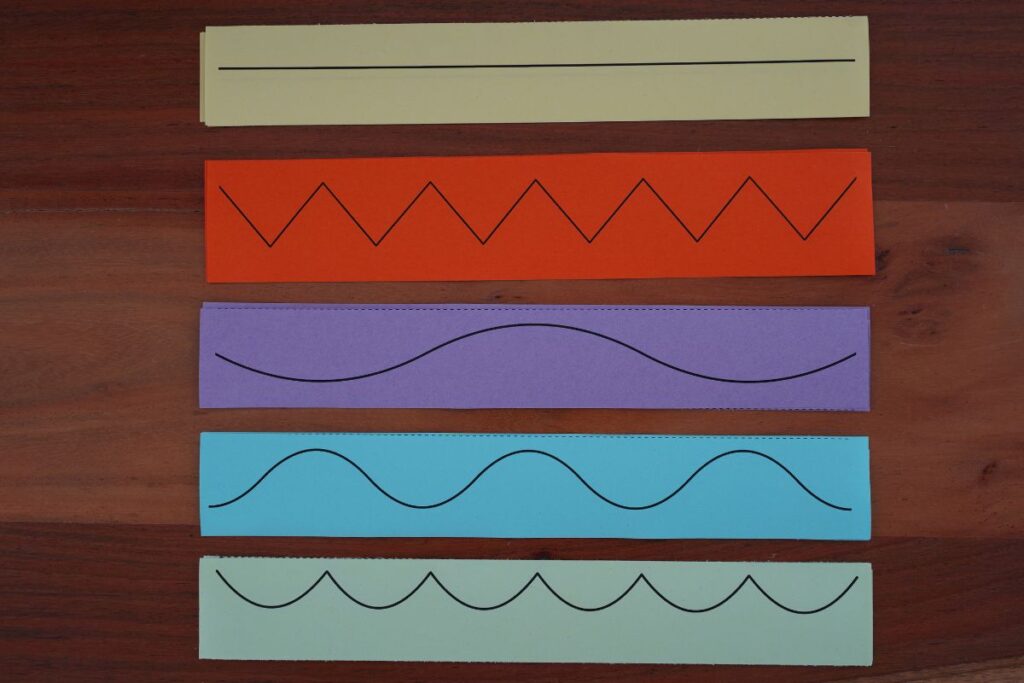
Different Cutting Strips Patterns and How to Use them
To prepare the cutting strips you will:
- Print each page single-sided.
- Print each page on different colored paper (optional). I like to do this to make them more interesting and to also visually differentiate the different patterns.
- Prepare the strips by cutting each one at the dotted line.
The patterns that you will find in this PDF are organized from easiest to more difficult. This will give you an idea of where to start with your child and what comes after.
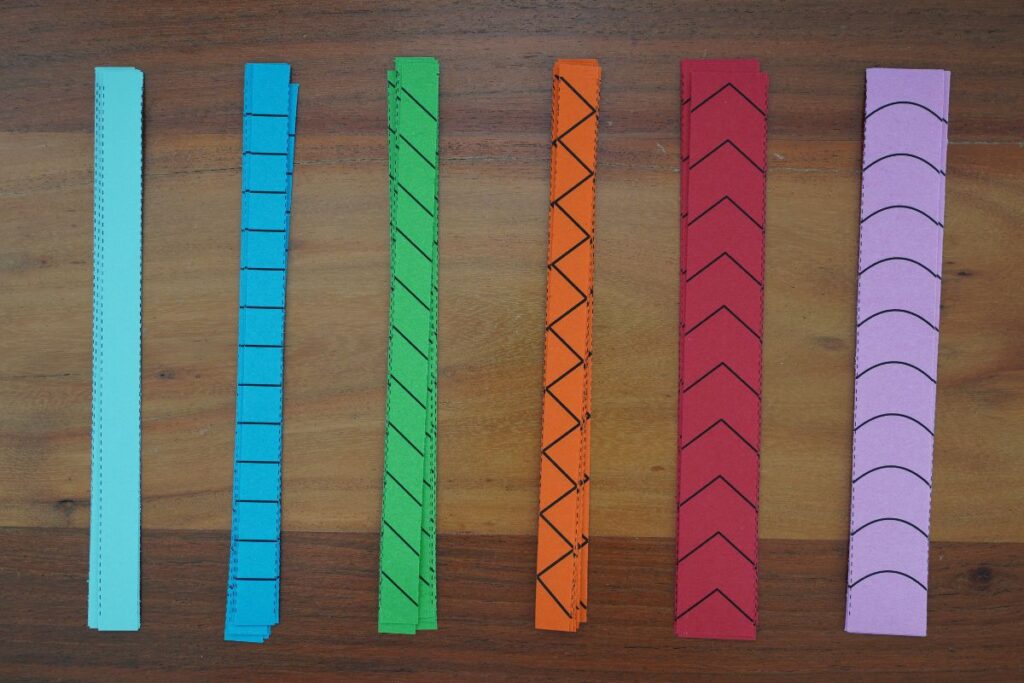
The “blank strips” are used the first ones in the classroom for small children that are starting to use scissors. If you observe that your child has difficulty cutting these black strips, perhaps is better to print them in carboard paper instead of normal paper. I find that, when children are starting to cut, it is easier for them to cut on carboard because it doesn’t fold so easily like paper does. When you see they are starting to get more comfortable with the scissors you can then change back to paper.
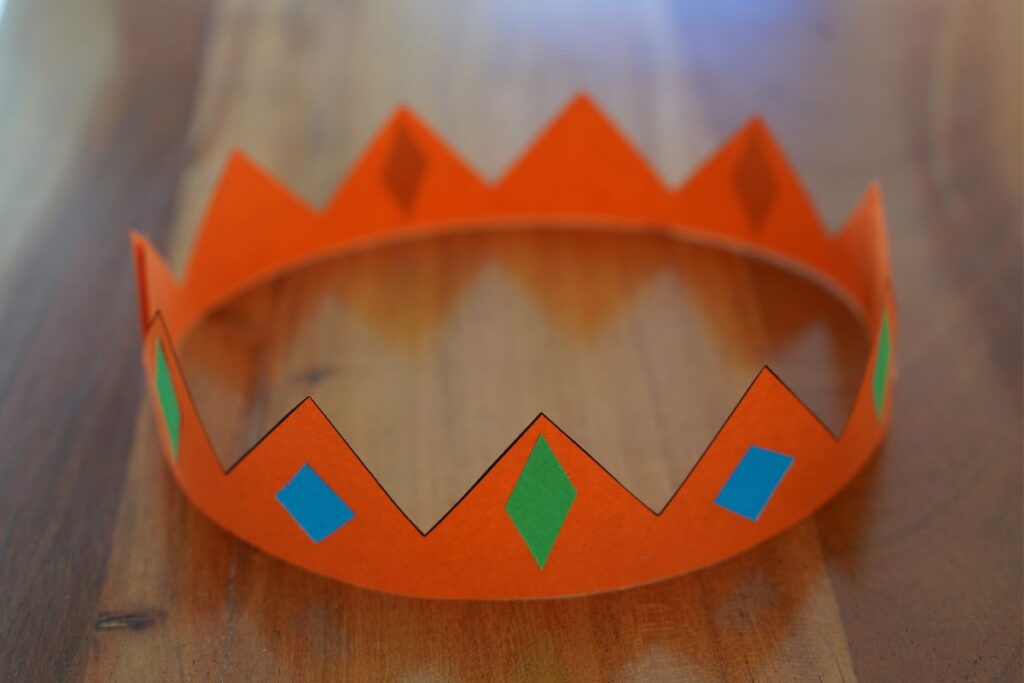
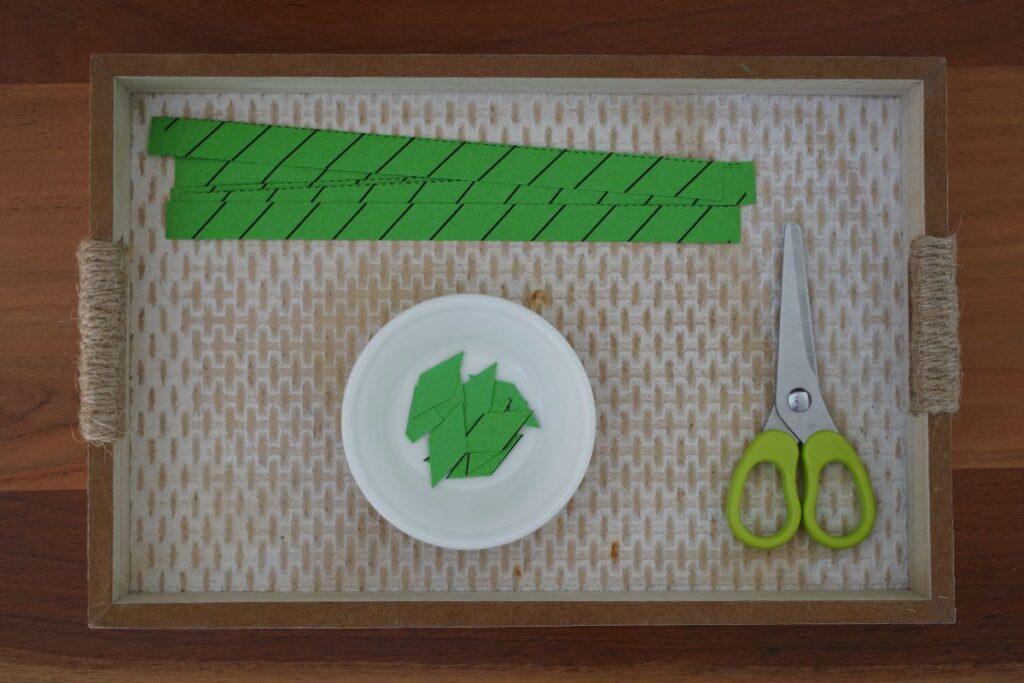
These longer and thicker strips are the ones my children used in the classroom to make crowns. After your child has cut the strips, join the ends of the two pieces together with tape to make a crown. You can also use smaller pieces of paper from other cutting strips to decorate it. Show this to your child and let them be creative!
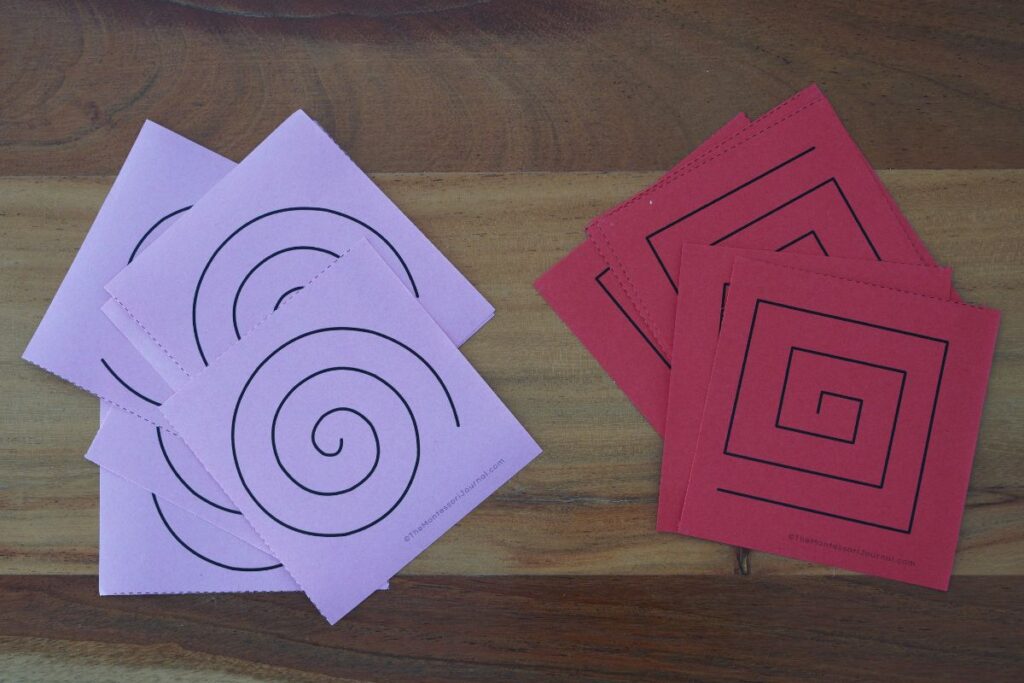
These last two patters are the harder ones, so your child would have had a lot of practice with the other ones first.
Montessori Cutting Strips Presentation
Preparation: None
Materials:
- Scissors with blunt tip
- Prepared cutting strips
- A small container to hold the pieces of paper that are being cut
- A tray to carry the materials
Age: 2 ½ – 4 ½
Presentation:
- Show your child how to hold the scissors properly.
- Show your child how you cut one of the strips of paper and put the pieces on the container.
- Invite your child to continue cutting the rest of the strips.
- Fade and observe.
Conclusion
Children love working with their hands; it is how they learn and reach concentration. As we give them opportunities to develop their abilities we will see that they are much more capable that we think they are.
This cutting activity is a simple way to help your child improve their fine motor skills, hand-eye coordination and concentration. Make sure to download these cutting strips below!
Montessori Cutting Strips

How to Cut with Scissors: Montessori Cutting Strips
Cutting paper is a classic Montessori Practical Life activity that helps children build fine motor strength, improve hand-eye coordination, and develop concentration. Using progressive cutting strips with different line patterns, children refine their scissor skills while gaining confidence and independence. Below you’ll find a free printable PDF with 13 Montessori-inspired cutting strips designed to support your child’s development.
Target ages: 2 ½ to 4 ½ years old.
Materials
- Scissors with blunt tip
- Prepared cutting strips
- A small container
- A tray to carry the materials
Instructions
- Introduce the activity to your child: "Today I am going to show you how to cut with scissors. Let's bring this tray to the table".
- Sit at the table with the tray in front of your child.
- Take the scissors and show your child how to hold them correctly, with their thumb in the small hole and fingers in the larger one.
- Choose one strip and cut it slowly so your child can carefully observe each movement. As you cut, let the pieces of paper fall into the small container.
- When done, invite your child to continue cutting the rest of the strips
- Fade and observe.
Notes
Go to my website to download this free printable PDF with 13 progressive cutting strips!