How to Make Rolled Beeswax Candles with Young Children
Making candles with young children is a wonderful activity that promotes fine motor skills, patience and a big sense of accomplishment. Beeswax rolled candles are an excellent choice for little ones because they are non-toxic, eco-friendly, easy and safe to make. In this post, we’ll guide you on how to create these beautiful candles with your children—perfect for enjoying together or giving as thoughtful little gifts!
Target ages: 2 ½ and up

Why Crafting with Children is Important
I don’t know about you, but my children could happily do crafts all day! I’ve noticed something though, when they are crafting, they often reach a much deeper level of concentration than when they’re simply playing with toys. It seems like the work (rolling, shaping, creating, etc.) draws them into a kind of calm focus that feels meaningful and real.
I believe the reason for this is simple: crafting gives children the chance to work with their hands in a purposeful way. When they use their hands, they are not just playing, they are learning, exploring, and connecting their minds with the world around them. As Maria Montessori famously said, “The hands are the instruments of man’s intelligence.”
Working with materials in this way supports not only fine motor development, but also concentration, patience, and confidence. It’s more than just making something pretty, it’s about engaging the whole child in a thoughtful, sensory experience that helps them grow.
One craft that I’ve found especially engaging for children is making rolled beeswax candles. Not only does this activity offer all the benefits of hands-on work, but it also introduces children to natural, safe materials in a calm and purposeful way.
Why Choose Beeswax Candles for Young Children?
We love lighting candles in the evenings, the warm light always feels calming and peaceful. But it was only recently that I learned more about the hidden cost of many commercial candles: when burned, they can release volatile organic compounds (VOCs) from petroleum‑based paraffin wax and synthetic fragrances into the air we breathe.
Because we enjoy candles so much at home, I didn’t want to give up that warm light but I also didn’t want my children to be exposed to unnecessary chemicals. That’s when I discovered beeswax candles. Beeswax is a natural, non‑toxic, biodegradable wax that burns more cleanly than many commercial options because it doesn’t contain artificial dyes, fragrances, or petroleum byproducts.
I was thrilled to find a local store that sold pure beeswax sheets and cotton wick, so we started making our own at home. To my surprise, it was incredibly easy and didn’t take much time at all; and the delicate, honey‑like scent made the whole experience even more lovely.
Now, when we light a candle at night, I feel confident that it’s a safer choice for our family. And the best part? My children beam with satisfaction knowing they’re enjoying something they made themselves.
Supplies Needed for Rolled Beeswax Candle Making
One of the benefits of rolled beeswax candle making is its simplicity. Only a few materials are needed, and each item serves a clear purpose. Keeping supplies minimal helps children focus on the work itself and supports an orderly, prepared environment.
Here’s what you’ll need:
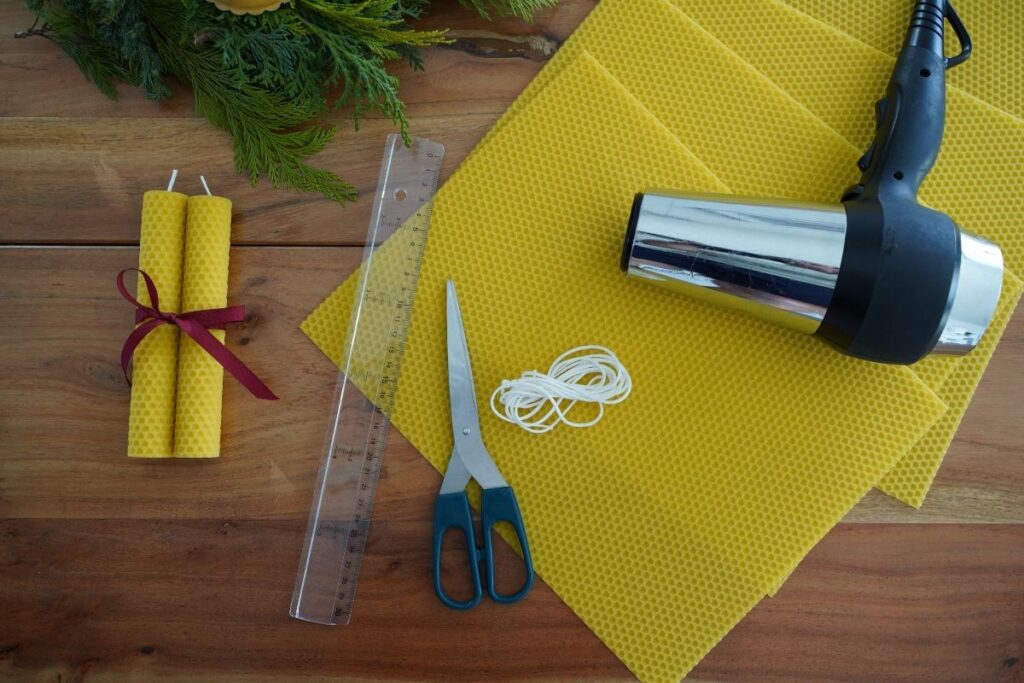
- Beeswax sheets – Choose natural beeswax sheets that are soft and flexible. These are easy for little hands to roll.
- Candle wicks – You can use either cotton or wooden wicks depending on your preference. In this guide, we’ll be using cotton wicks, which are simple for children to work with.
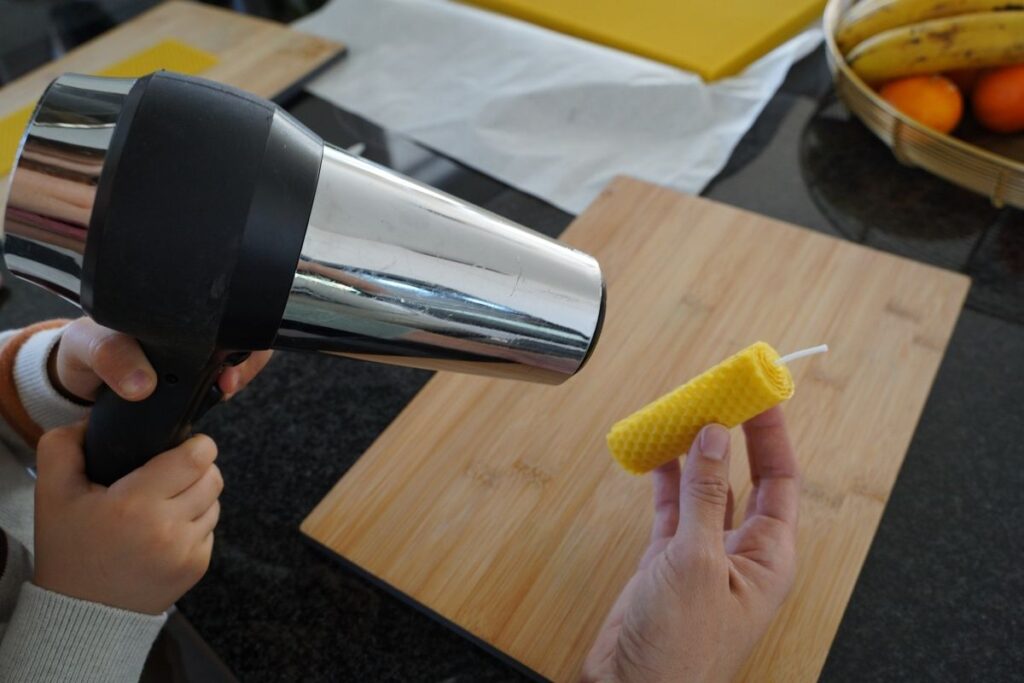
- Blow dryer (optional) – A blow dryer can be helpful to gently warm the beeswax sheets while rolling, preventing cracks and helping seal the final candle. Only a few seconds of gentle heat are needed.
- Ruler – Use a ruler to measure and divide the beeswax sheets evenly, depending on the length of the candles you want to make.
- Scissors – To cut the beeswax sheets after measuring. Make sure scissors are child-friendly if your little ones will be helping.
By preparing these materials ahead of time and keeping the workspace organized, you create a calm and inviting environment where children can enjoy the process of making their candles.
How to Make Rolled Beeswax Candles with Young Children
Begin by preparing the environment. Set out the materials on a clean work surface, ideally on a tray or placemat. Keeping the space orderly and uncluttered helps children understand the sequence of the activity and supports focused work.
- Gather your materials and introduce them to your child.
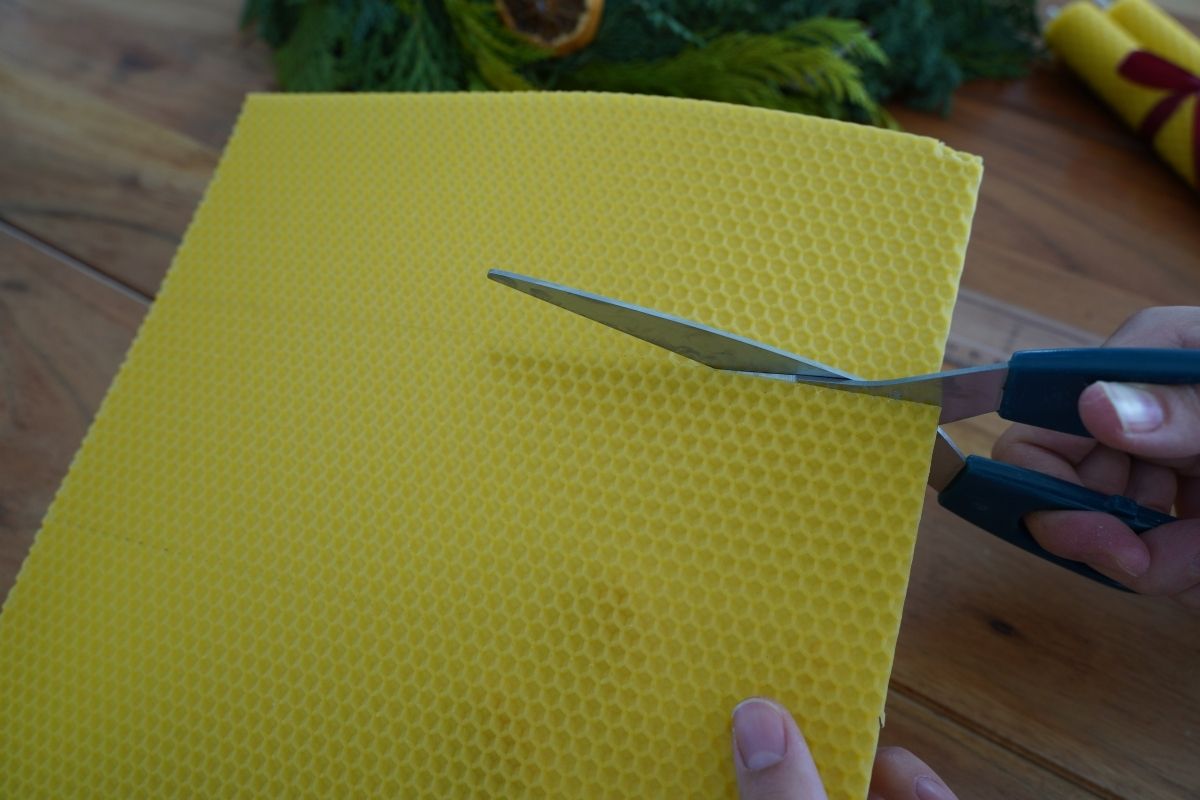
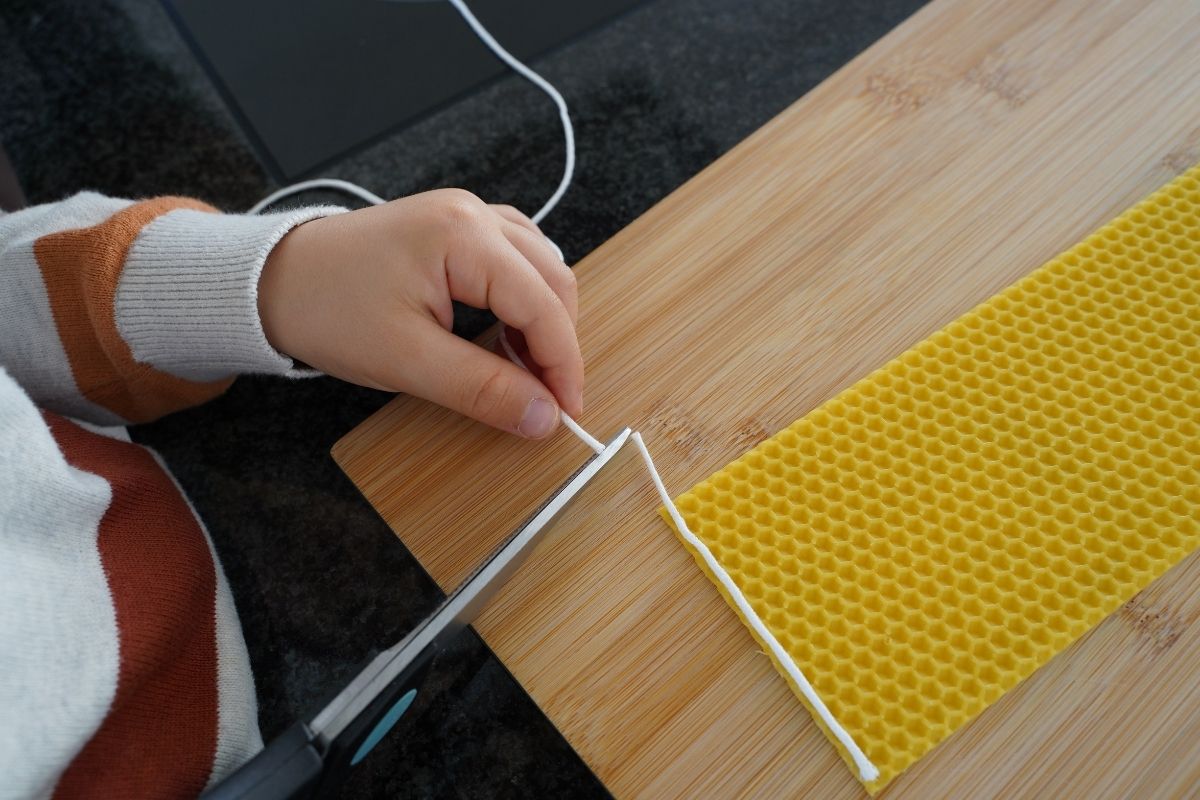
- Use a ruler to measure the beeswax sheets to your desired candle length.
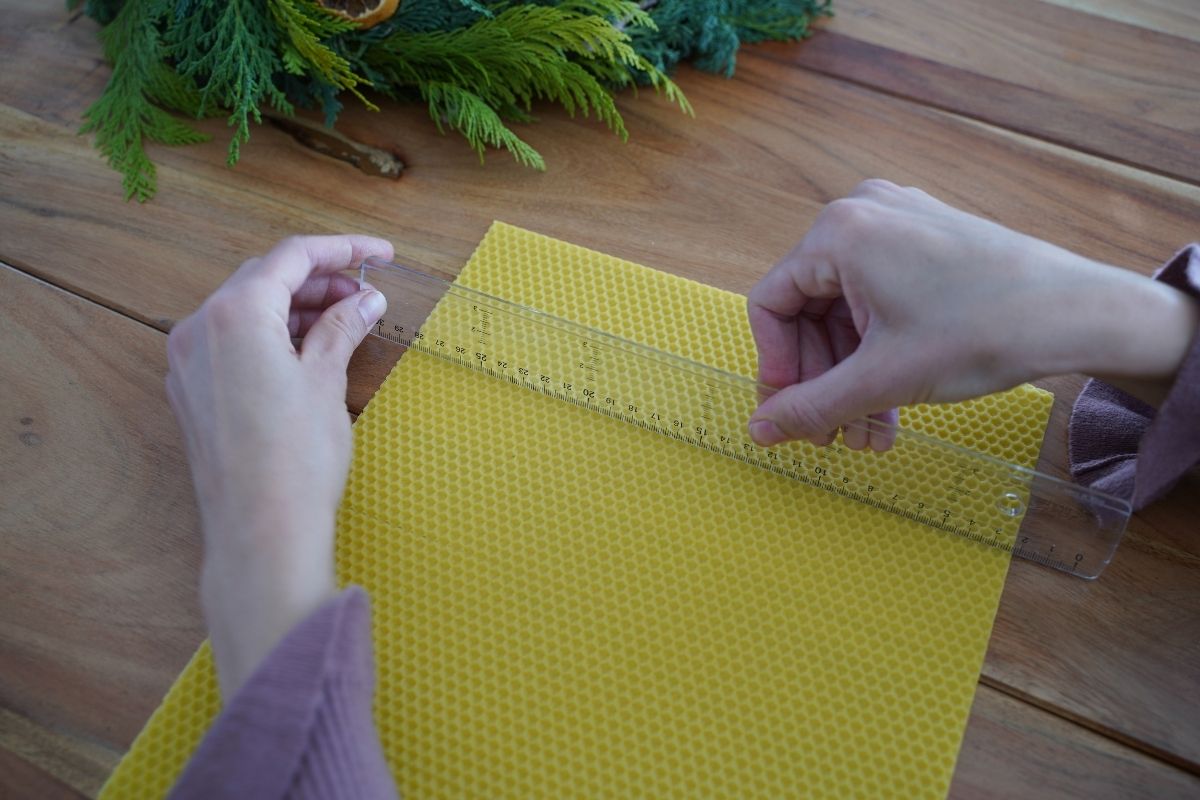
- Gently mark a line or dent in the wax as a guide for cutting, then cut along the line to create evenly sized sheets.
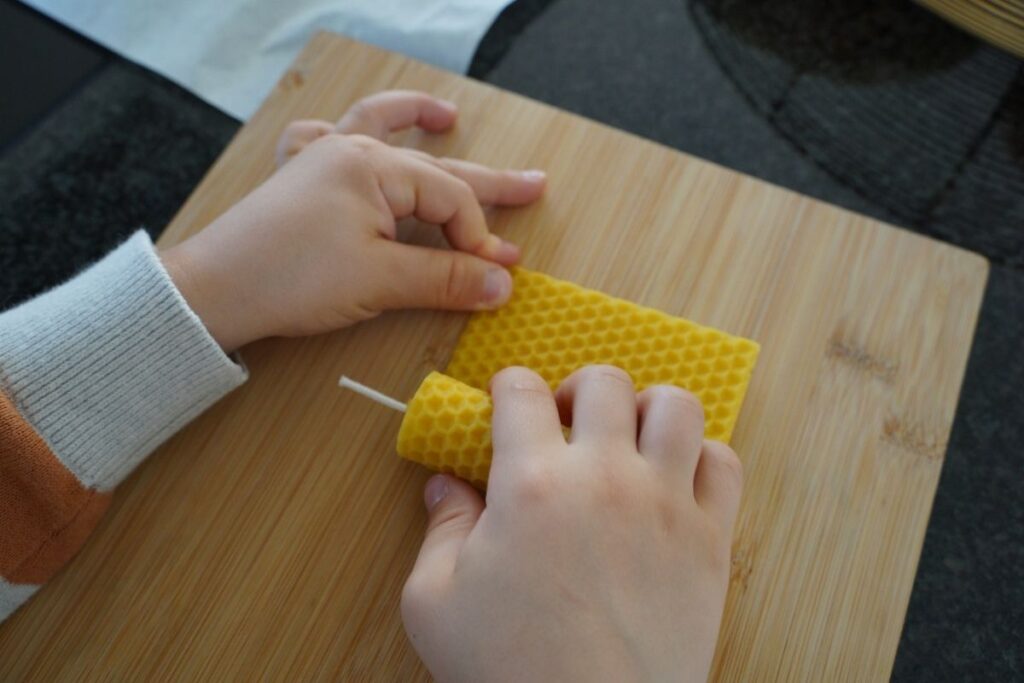
- Lay the wick along one edge of the beeswax sheet and press it onto the wax to secure it in place.
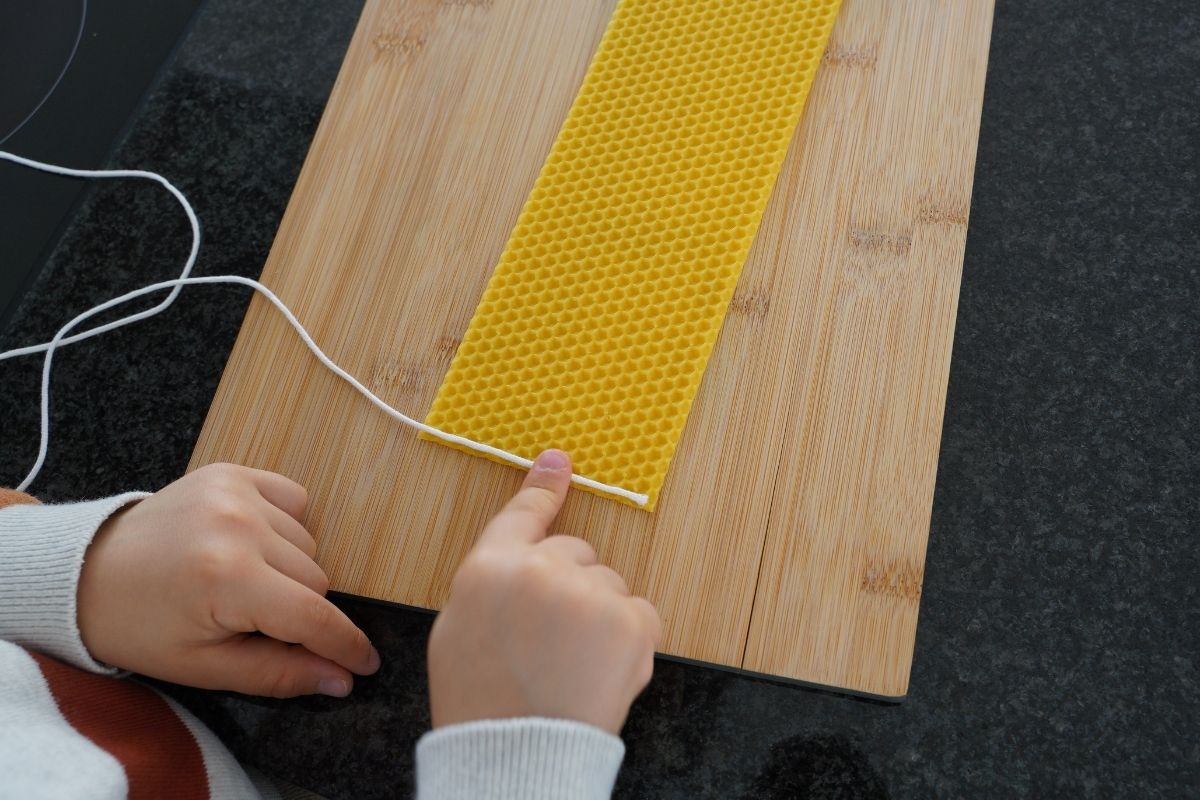
- Cut the wick leaving a small amount extending beyond the top.
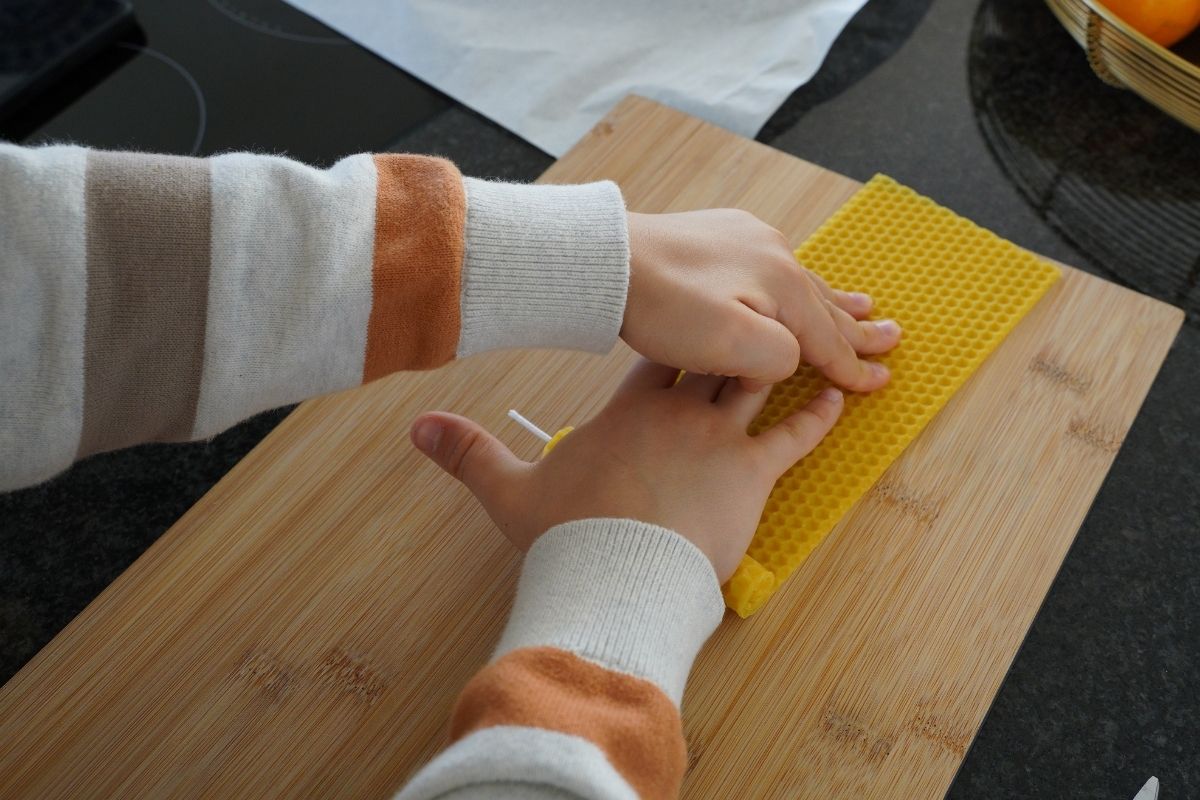
- Begin rolling slowly using gentle pressure. Help your child start rolling the wax tightly around the wick. Once the roll is started, many children are able to continue independently.
- When you reach the end, warm the edge slightly with the blow dryer and press it gently to seal the candle.
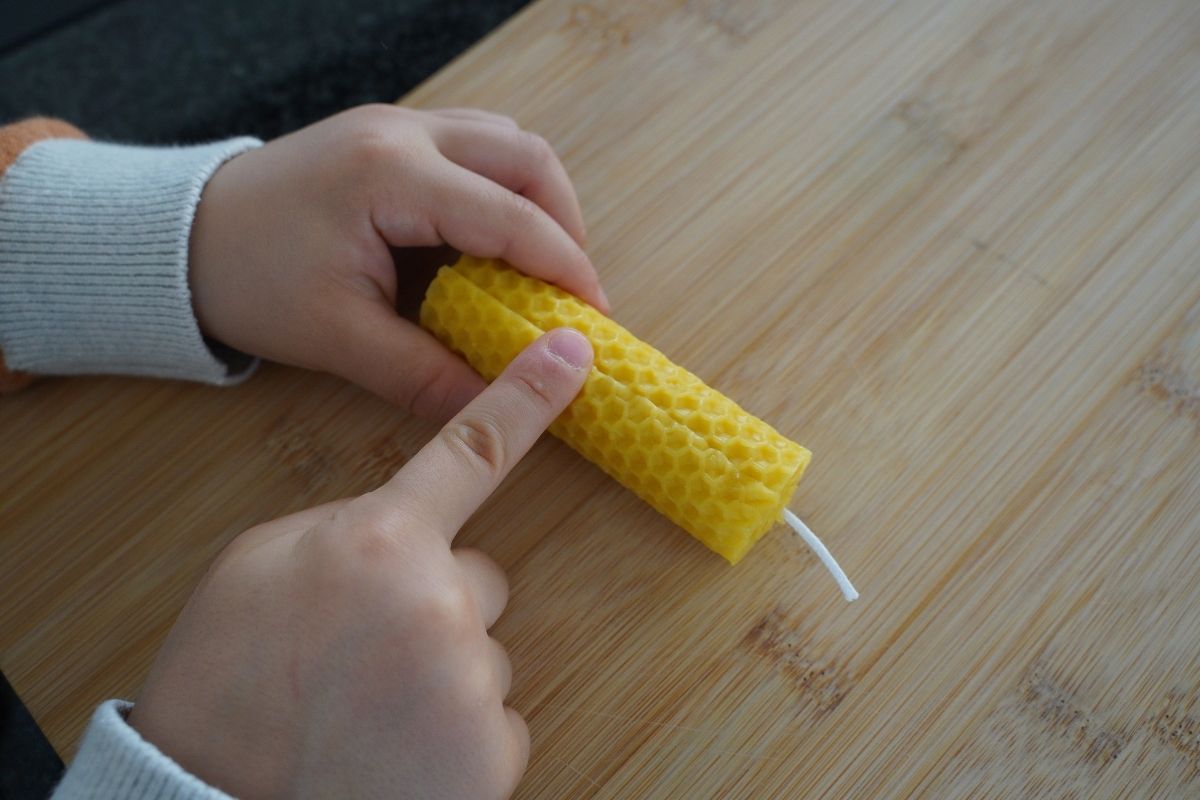
- Once fully rolled, the candle is complete. Invite your child to place it in a candle holder and observe their finished work!
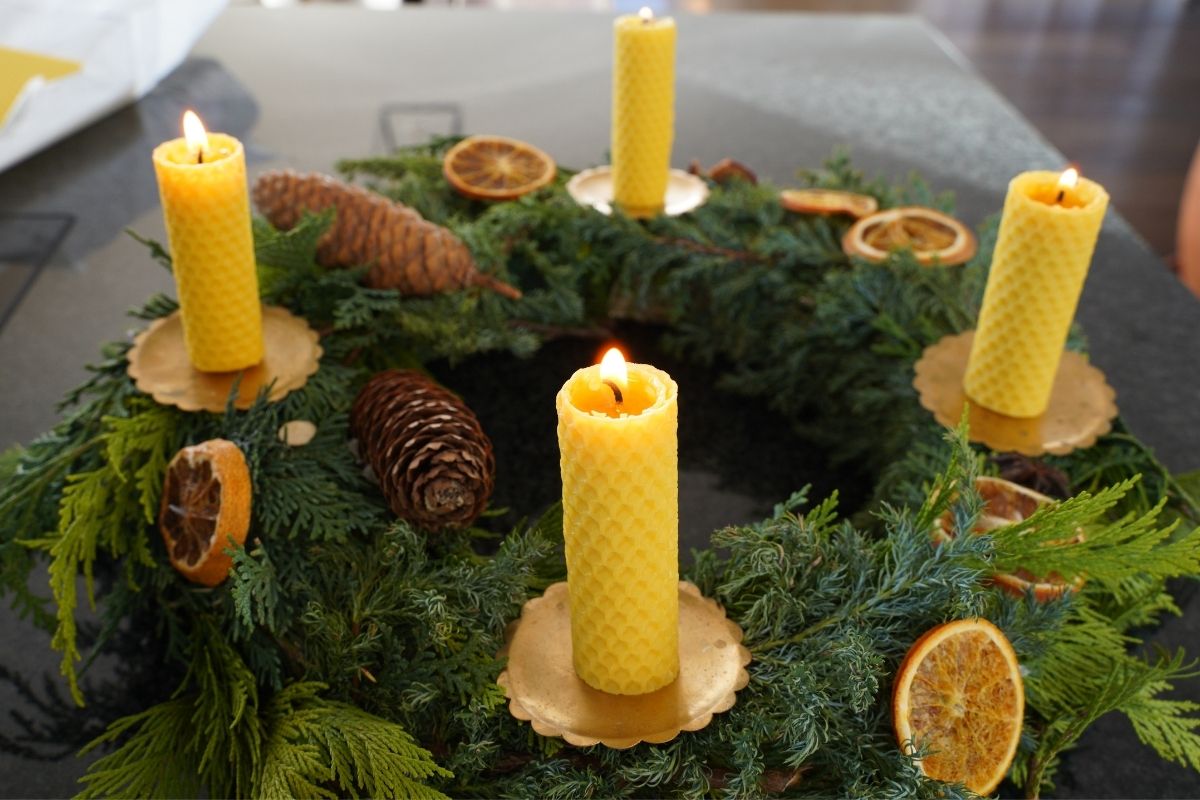
Throughout the activity, allow your child to work at their own pace. The goal is not perfection, but engagement and satisfaction in completing a real, purposeful task. The finished candle can be used at home, in classroom or gifted as a special gift!
Tips for Making Rolled Beeswax Candles with Children
Rolled beeswax candles are simple to make, but a few tips can help make the process smoother and more enjoyable for both you and your child:
- Work with soft, flexible beeswax – If the sheets feel stiff, a few seconds with a blow dryer can make them easier to roll without cracking.
- Keep edges aligned – Encourage children to keep the edges of the wax straight while rolling. Small adjustments along the way help the candle look neat and sturdy.
- Roll slowly and gently – Remind children that slow, steady movements work best. Rushing can cause the wax to tear or wrinkle.
- Use a tray or placemat – A defined workspace keeps materials contained and helps children understand where the activity begins and ends.
- Start with shorter candles – For beginners, smaller sheets are easier to handle and less frustrating to roll.
- Celebrate the process, not perfection – Focus on the experience and learning rather than a flawless final product. Every candle a child makes is unique and special.
By keeping these tips in mind, rolled beeswax candle making can be a calm, engaging, and rewarding activity for children of all ages.
Conclusion
Rolled beeswax candle making is a simple, hands-on activity that supports fine motor skills, concentration, and independence. Working with natural materials allows children to connect with their senses, take pride in their work and experience the joy of creating something real.
Affiliate Disclaimer: Some links on this site are affiliate links. If you make a purchase, I may earn a small commission at no extra cost to you. As an Amazon Associate, I earn from qualifying purchases. I only share products I truly recommend.