5 Easy Montessori Practical Life Activities for 3-Year-Olds
Here are five easy Montessori Practical Life activities you can set up at home using every day materials. At three years old, children are naturally drawn to real, purposeful work and love repeating movements as they build new skills. This repetition strengthens their focus, coordination and independence. These activities are designed to meet that need, and your little one will likely return to them again and again.
Target ages: 3 years old.
What Is the Montessori Method?
The Montessori Method follows the child’s interests and needs. Maria Montessori created different areas in the classroom (Practical Life, Sensorial, Math and Language) with specific materials to teach children different skills that will help them in their everyday life.
If you think about a normal school, you would probably imagine a big chalkboard on the wall and all of the students sitting at their desk looking at the teacher. In a Montessori classroom this looks very different. The main difference between a Montessori school and a traditional one is that the teachers give one-on-one lessons, or very small group lessons, and follow the interest of each child. Individual lessons are a great way for teachers to get to know the children and their needs. We use tangible materials that are built to teach specific skills, perfect to catch the attention of the little ones since they are using their hands. Maria Montessori once said: “Movement of the hand is essential. Little children revealed that the development of the mind is stimulated by the movement of the hands. The hand is the instrument of the intelligence”.
In the Montessori classroom, children are also allowed to walk freely in their environment and choose the work they want to do that has been previously presented by the teacher. Seeing children walking around the classroom like this can look a little messy at times, but I like to call it “organized chaos”. Children have a lot of freedom but within set boundaries.
The Montessori Method has been such a big eye opener for me in the way I want to teach and educate my children. I hope it inspires you too!
What Is the Practical Life Area in Montessori?
Practical Life is an area in the Montessori curriculum where the children learn daily life skills that helps them become more independent, gain confidence and develop fine and gross motor skills.
When Maria Montessori started her educational career, she put a lot of emphasis on children’s hygiene and on different activities that encourage their independence. This is where the area of Practical Life was born. These activities are normally the first ones we introduce to children. They all have very specific goals. Maria Montessori summarized the purposes of the Practical Life activities like this:
- Independence: The goal of these activities is to help children develop the life skills necessaries to succeed in the world.
- Concentration: Children are drawn to Practical Life activities. This makes them want to repeat them over and over again. Repetition promotes concentration, which is very important for their development.
- Coordination of Movement: With these exercises the children practice fine and gross motor skills. At the same time, they gain coordination and refinement of their movements.
- Order: Every Practical Life activity follows a sequence of steps that the children need to follow. When we show these activities to our children it is very important to practice them before so that we know exactly what movements we are going to do what steps we are going to follow. This helps children with their Sensitive Period for Order that they are experiencing at this stage of their lives.
- Adaptation: Practical Life exercises are specific to each child’s culture. Some activities in Europe may look a bit different from others in Asia (for example: learning how to use cutlery). We also use real child’s size objects (like the ones they see in their house), not toys. This helps children adapt to their environment and learn how to interact with it.
- Supports development of the Will: Practical Life activities help children to develop self-discipline and self-control.
Considerations When Making Your Own Montessori Materials at Home
As a mom and Montessori teacher, there is nothing that I love more than teaching my own children the different Montessori lessons that I used to teach in the classroom! But because Montessori materials are so expensive, I had to come up with different ideas to make them myself. My goal is to save you time and money, whether you’re a parent or a teacher, and equip you with the resources and knowledge to help your children thrive in any learning environment!
There are a few things to consider when making your own Montessori materials at home. Maria Montessori taught they should be:
- Color Coded: When possible, make sure the objects in the activity are presented with the same color. This helps children with their own mental order.
- Child’s Size: Use real objects that are also size appropriate for your child’s little hands.
- Attractive: Children (and adults) are drawn to beautiful things. Make your activities beautiful by keeping them simple, clean, color coded and using real objects.
- Progression of Difficulty: The activities should follow others that get progressively more challenging.
- Separation: Keep the materials for each individual activity in a separate container or tray.
- Rotation: Change up the activity from time to time to keep it interesting! You can make different variations of it or change the objects (for example: use different types of pitchers or spoons) to keep children coming back to it.
- Open Ended: These activities don’t have an end which means children can work with them over and over again. This fosters their concentration and sense of achievement.
5 Practical Life Montessori Activities
Practical Life activities help young children build independence, coordination and confidence through everyday tasks. Below are five easy Montessori activities you can try at home using simple materials you likely already have.
Separating mixtures: Sifting Semolina and Lentils

Materials:
- Tray
- 1 medium bowl with a mixture of semolina and red lentils (or a different legume)
- 2 identical empty small bowls
- 1 small sieve
- 1 teaspoon
Presentation:
- Introduce the activity: “Today I am going to show you how to sift semolina and lentils. Can you bring the tray to the table?”
- Sit next to your child and place the tray in front of them.
- Talk about what you see: “We have a mixture of semolina and red lentils in this bowl. I am going to sift them. Watch.”
- Take the sieve and place it over the empty bowl on that’s on the left side.
- Pick up a small amount of the mixture with the teaspoon and carefully place it into the sieve.
- Hold the sieve steady and gently move the spoon in small circles, allowing the semolina to fall into the bowl below.
- When only lentils remain, pour them into the other empty bowl that’s on the right side.
- Repeat a few more times and then invite your child to have a turn.
- Step back and observe.
- When finished, invite your child to mix the materials again or return the tray to the shelf.
Following Exercises:
- Use different dry materials to sift (rice, lentils, small shells, beans).
- Introduce sieves with different hole sizes.
Polishing Leather Shoes

Materials:
- Tray
- Natural shoe polish (recipe in Notes)
- 2 cotton pads
- Small brush
- Small polishing cloth
- Newspaper page or mat
- Leather shoes
Presentation:
- Introduce the activity: “Today I am going to show you how to polish leather shoes. Can you bring the tray to the table?”
- Sit next to your child and place the tray in front of them.
- Name the materials: “This is a brush. This is the shoe polish. This is a cotton pad. This is a polishing cloth.”
- Lay the newspaper on the table and place the shoe on top.
- Open the polish slowly.
- Take one cotton pad and gently rub it into the polish.
- Apply the polish to the shoe using small circular motions. Work evenly over the entire surface.
- Close the polish.
- Pick up the brush and brush the shoe with steady back-and-forth strokes.
- Finally, take the polishing cloth and buff the shoe until it shines.
- When finished, place the shoe to the side.
- Give your child the other leather shoe and invite them to have a turn.
- Step back and observe.
- When your child is done, invite them to neatly return all materials to the tray and place the tray back on the shelf.
Following Exercises:
- Polishing other shoes.
Notes:
- Many store-bought shoe polishes have a strong smell and may contain ingredients that are not ideal for young children. I noticed they often gave me a headache, which is why I began making my own natural version.
- Natural Shoe Polish Recipe:
- 1 part beeswax.
- 3 parts oil (jojoba is best, almond or olive also work).
- Melt beeswax gently in a double boiler. Stir in the oil. Pour into a small container and let it cool.
- Avoid polishing suede leather.
Sewing on a Button

Materials:
- 3 or 4 small pieces of felt
- 3 or 4 pre-threaded needles with knotted thread (stored on a small cushion, if possible)
- A variety of buttons with holes (2-hole and 4-hole)
- Small scissors
- Tray
Presentation:
- Introduce the activity: “Today I am going to show you how to sew on a button. Can you bring the tray to the table?”
- Sit next to your child and place the tray in front of them.
- Choose one piece of fabric and place it on the table.
- Choose one button and place it on top of the fabric where you would like it to stay.
- Take a pre-threaded needle.
- Hold the button steady with one hand.
- Push the needle up through the fabric and one hole of the button.
- Pull the thread through slowly until the knot touches the fabric.
- Insert the needle down through the opposite hole.
- Pull gently to tighten.
- Repeat this motion several times to secure the button.
- If using a four-hole button, switch holes and repeat.
- When finished, cut the thread with the scissors. If your child knows how to tie a knot, invite them to do so. If not, you may leave the thread as it is.
- Invite your child to try: “Now you can sew as many buttons as you’d like!”
- Step back and observe.
- When finished, invite your child to return the materials to the tray and place it back on the shelf.
Following Exercises:
- Use different sizes and shapes of buttons.
- Practice sewing on old clothing.
Stitching on Burlap

Materials:
- 2 rectangular pieces of burlap (one for you and one for your child)
- 2 pre-threaded yarn needles with knotted yarn
- Scissors
- Tray
Presentation:
- Introduce the activity: “Today I am going to show you how to stitch on burlap. Can you bring the tray to the table?”.
- Sit next to your child and place the tray in front of them.
- Take one piece of burlap from the tray and place it on the table in front of your child.
- Take a pre-threaded needle.
- Hold the fabric steady with one hand.
- Push the needle up through one hole of the fabric, starting at the edge on the left side.
- Count four holes and push the needle down through the fabric.
- Repeat the process, counting four holes each time, stitching in a straight line from left to right.
- When finished, cut the thread close to the needle.
- Do a double knot or leave it as it is, depending if your child knows how to knot or not.
- Invite your child to do the activity: “Now it is your turn to stitch the burlap!”.
- Step back and observe.
- When your child is finished, show them how to clean up and throw away the leftover yarn in the trash.
- Invite them to place the tray back on the shelf.
Following Exercises:
- Invite your child to draw a simple shape in the burlap that they can stitch along the lines that they drew.
- Introduce other types of needle work: cross stitch, needle point, embroidery, etc.
Notes:
- If it is too hard for your child to count the holes in the burlap, you can draw dots with a permanent marker so that they know where they need to push the needle through.
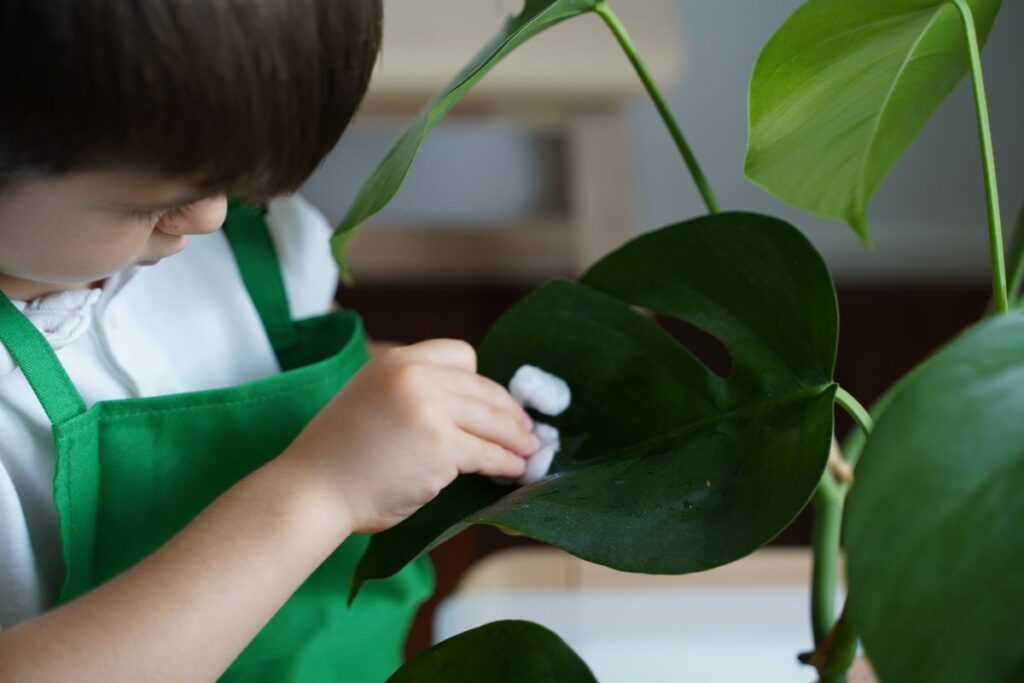
Care of Plants

Materials:
- 3 Cotton balls
- Small dish
- Small pitcher with water
- Small bucket
- Apron (optional)
- Table mat with ring (to protect table from spills)
- Tray
Presentation:
- Introduce the activity: “Today I am going to show you how to take care of plants”.
- Invite your child to put on an apron, if using one.
- Place the mat on the table and bring the tray.
- Choose a plant together and place it on the mat.
- Pour a small amount of water into the dish.
- Dip a cotton ball into the water.
- Hold a leaf and gently wipe it with the damp cotton ball.
- Explain that when the cotton ball gets dirty, it can be placed in the small bucket and replaced with a clean one.
- Give your child a turn: “Now you can clean some leaves.”
- Step back and observe.
- When finished, throw away the used cotton balls, wipe any spills and return the materials to the shelf.
Following Exercises:
- If we have a plant with dry leaves, we can show our child how to use the pruning scissors to gently cut the leaves off of the plant.
Notes:
- If the plant is too large to carry to the table, bring the tray with the materials next to the plant and place them on a small chair or stool.
Conclusion
Practical Life activities may seem simple, but at three years old they meet some of your child’s deepest developmental needs. Through repetition and purposeful work, children strengthen concentration, coordination and independence. Start with one activity, present it slowly and then step back. You might be surprised by how capable your little one can be!
Affiliate Disclaimer: Some links on this site are affiliate links. If you make a purchase, I may earn a small commission at no extra cost to you. As an Amazon Associate, I earn from qualifying purchases. I only share products I truly recommend.